- Published on
Tooling in Unity
- Authors

- Name
- Ryan Flores
- @_TrustyTea
Hello and welcome! This week I decided to learn a bit about and practice my tooling in Unity. I started off by making a Behavior Tree Editor, but I started to get a little confused with it all and decided to wait to finish that and learn with an easier project, a Loot Table Editor.
This project introduced me to a few new things like
The AssetDatabase
Editor Class
Custom Inspectors
Why did I make this?
The main reason is that I just wanted to learn about and get more comfortable with writing tools in Unity.
I do think that this tool in particular will help me in the future with creating loot tables for different entities. Not that it was necessarily hard to do before, but this streamlines the process and makes it a whole lot faster to do.
When I started making the Behavior Tree editor, I used Unity’s Experimental Node UI Elements to make visual nodes for each of the node in the behavior tree. With UI Toolkit, a lot of this set up has been pretty simple and easy, but I realized I was coding in more UI elements by hand rather than using the UI Builder which would have been easier to do. I wanted to take this approach when I made my Loot Table Editor so I began by replicating what I already had from the Behavior Tree and changing a few things to get started.
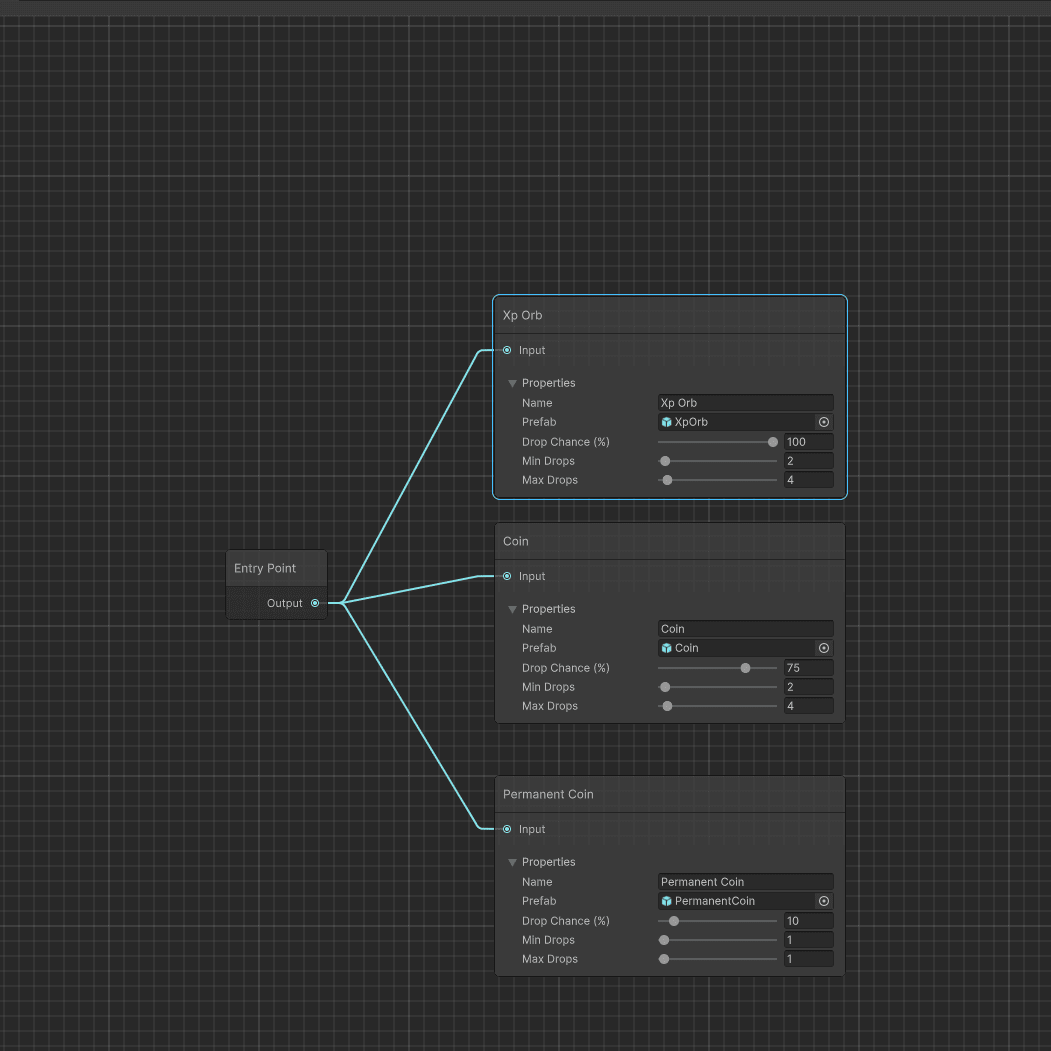
I had an idea where you’d be able to open the editor so see all possible Loot Tables on the “Inspector View” and you’d be able to select one and edit it. I got that working pretty quickly thanks to being able to query the AssetDatabae for all assets of type LootTable, which I used the return value of to populate the tree view of the inspector side of the window with entries. I created a Node class called LootItemNode which had a couple fields that would map to the fields of the ScriptableObject.
Below you’ll see what I had before I moved over from the idea of having a node based system for editing LootTable . I liked this at first but I quickly saw how messy this would start to look, even after being able to add dropdown menus to each of the nodes which would contain most of the space they took.

The node base system I replicated for the LootTables.
From Node to Grid
I like to go wide and explore different ways of doing the same thing before I go deep into one way, in case there is some other, better way. This time, it paid off. It still doesn’t mean that I won’t try and explore another way, but I do at least like this approach better than the node system I had previously.
I was watching a YouTube video by Warped Imagination on Unity tooling and found a video which talked about setting certain icons for your scripts which I thought was really cool, but the one thing that caught my eye from this video was the fact that you could do some sort of grid view for you editors. This lead me to think of an idea where my LootTable Editor would be this collection of cells where each cell was an item.
I got to work implementing this with my limited knowledge and got it working. I’d say that my code is pretty monolithic, but it works and I can refactor as I start to improve this. Each cell on the grid has a preview of what the item is which is the same as the item preview of the prefab of the item that is being dropped. I added a tooltip which quickly lets you know what the range of drops is as well as the % chance it has to drop.
I know there is a problem with this approach in that you need 2 windows open to be editing your loot tables, and I don’t think I like that so I’ll be figuring out a way to combine them, like I did with the inspector view and graph view , and the 2 panel views that UI Builder has. For now though, I wanted to share my progress and learnings of what is possible with tooling in Unity. I know there is SO much you can do and I’m excited to be diving into it and learning just how much I can do to make the lives of my designers easier.
A current look at the progress on my new LootTable editor window.
